XOOPS Cube Legacy Simple Secure Scalable Web Application Platform
Open Source Stack
Bundle Package
Framework Agnostic

Overview

Simple

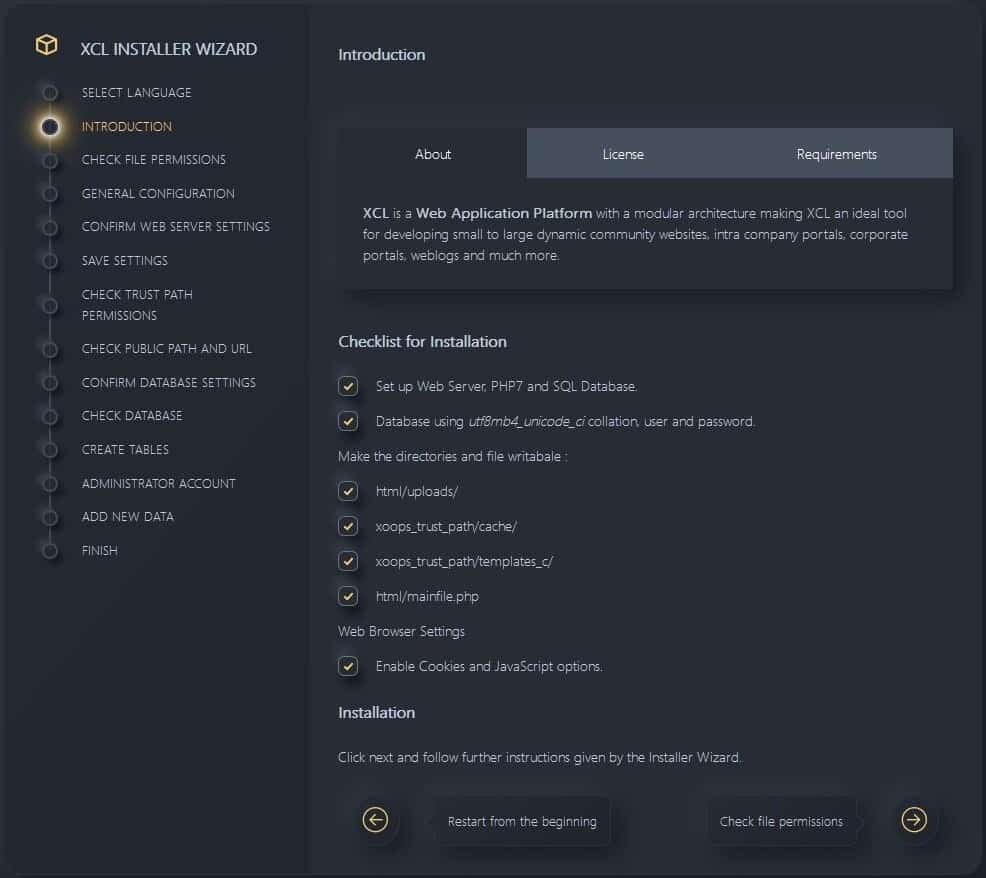
XOOPSCube Legacy (XCL) is a free and open-source Web Application Platform (WAP) empowering you to build, manage and deploy scalable web applications, custom Content Management System (CMS), forums, community discussion board and knowledge management systems, or multiple blogs (e.g. WordPress). The XCL bundle package is designed for easy usage and to benefit from the performance of XCube Core and the most popular web server stack: Apache, MySQL and PHP.

Secure

XCube Core (©2005-2022 Minahito, BSD) is secure by design, in software engineering, means that software products and capabilities have been designed to be foundationally secure. However, the module Protector (©peak.ne.jp, GPL) is installed to provide an extra layer of security to the subsystem Legacy (©XOOPSCube, GPL) — which provides backward and forward compatibility with older systems and new modules or frameworks.

Scalable

Scaling a web application means allowing more people to use the application and being able to meet increasing demand, without changing the code, data or your trusted system. You can deploy additional infrastructure and offload functions, including SSL/TLS termination, cloud storage, static content delivery and server-side rendering, that would otherwise overload your application server.

Self-hosting

Self-hosted platforms are decentralized, allow for superior accessibility, customization of features and style, which means you are not dependent on a centralized service and are also free to choose your hosting service as the number of users grows. You have full control over your own data and services, rather than depending on expensive third-party services (cloud, saas).


Get Started

This guide focuses on the user-friendly Web installation wizard !

Running a local instance (Linux, macOS, Windows) and deploying to your dedicated server or shared hosting is fairly easy.

  1. Upload a Zip file to your server
  2. Extract the files to the web root
  3. Browse to your install URL
  4. Follow the steps in the Installer

The XCL bundle package is designed to run smoothly on any local server environment bundle LAMP, MAMP, XAMPP,
dedicated server, virtual private server (VPS) or shared hosting.

Public Web Root

The document root, or web root, is the folder where the files for a domain are stored, usually /public_html/
Some hosting providers can serve addon domains and subdomains as sub-folders /domains/example.com/html/

Requirements

Web Server

Apache 2.4.x mod_rewrite — Nginx 1.20.x
any server supporting PHP and MySQL

Database

MySQL 5.6—8.0 — MariaDB 10.5.xx
Other databases supported by modules

Scripting language

PHP 7.2.x — PHP 7.4.x
PHP 8.x Refer to module compatibility!

Memory

Minimum 64 Mb — 256 MB
Most Hosting providers offer enough RAM

Disk Space

100MB — 200MB
Plan ahead backups, cache, add-ons

PHP extensions

Built-in extensions and modules
Refer to modules requirements

Prerequisites

  • You need a new database InnoDB collation utf8mb4
    the install wizard can create it with the proper privileges
  • you need the database name, username and password
  • and you obviously need the latest XCL Bundle Package

Plan ahead to meet the ever-changing needs of your system and make sure your server can be upgraded with more disk space or cloud services for your storage needs. A standard installation requires a minimum of 100MB - be sure to account for backups, caching, modules and themes, files upload and media.


Download

You can download a ZIP file with the latest source code, a specific version or use the command line to clone the git repository.

Source code ZIP file

Download ZIP file with the latest source code from GitHub

XCL Releases

Browse the public repository by release name or tag version number

Clone from GitHub

Git clone the public repository with a command line.

Extract the ZIP file to your web root e.g. /public_html/ or a sub-folder /public_html/my-web-app/

You can also copy and paste the git clone command below into the terminal and press enter to create a local copy.

git clone https://github.com/xoopscube/legacy.git

Folder Structure

The XCL bundle package contains two folders needed to run the web application html and trust_path

Upload the XCL bundle package Zip file to your server using your hosting control panel and extract the files.
Otherwise, SFTP/SSH is a secure, easier, and robust alternative to upload or download files from your web hosting server.

Rename Folders

Before running the web installation wizard, you can rename html and trust_path to suit your project needs.
If you're using a FTP client to upload the files, make sure you don't change the tree-structured sub-folders.

Public - HTML

    
    html
    ├── class          [ sqlutility, phpmailer, abstract base class for forms ]
    ├── common         [ Locally shared CSS and Javascript ]
    ├── core           [ XCube Core IniHandler class ]
    ├── images         [ banners, icons, logos ]
    ├── include        [ legacy backwards compatibility ]
    ├── install        [ Web installation wizard ]
    ├── kernel         [ legacy subsystem interface ]
    ├── language       [ global translations ]
    ├── modules        [ user group management, render, private message, CKEditor... ]
    ├── preload        [ single file component e.g. add-on, plugin or extension ]
    ├── themes         [ frontend themes and templates ]
    └── uploads        [ public folder for avatars, icons, ranks, smiley ]


Private - Trust Path

    
    trust_path
    ├── cache          [ application cache data ]
    ├── libs           [ shared libraries: altsys, elfinder ]
    ├── modules        [ D3 modules are only duplicated on public/html/modules/ ]
    │   ├── d3forum    [ D3 forum and comment management ]
    │   ├── pico       [ D3 Content edition with granular permissions ]
    │   ├── protector  [ web application security module ]
    │   ├── xelfinder  [ file manager with multi-root and cloud storage support ]
    │   └── xupdate    [ Update manager for core, modules, themes and preloads ]
    ├── PEAR           [ Framework and distribution system for reusable PHP components ]
    ├── settings       [ XCube ini environment file using an inheritance pattern ]
    ├── templates_c    [ generated templates ]
    ├── uploads        [ read ]
    ├── vendor         [ composer further installations ]
    ├── wraps          [ static content managed by pico module ]
    └── .htaccess      [ apache, read ]


Permissions

XCL web installation wizard will check permissions of folders that require read and write access. These folders are used to store cached files, templates and files uploaded with the file-manager or packages delivered from GitHub by the Update manager.


        /uploads/
        /trust_path/cache/
        /trust_path/templates_c/
        /trust_path/uploads/
    

Warning

For security reasons, your TRUST_PATH should be located outside the web root public html of your server!
If that's not possible and if you are running Apache use the .htaccess file

Apache .htaccess file

Protect your TRUST PATH with an .htaccess that allows you to configure permissions without changing the server configuration. Read more about Apache HTTP server - Access Control and Authentication and Authorization


        # 2.4 configuration:

        Require all denied
    

Web Installation Wizard

Before you install XCL, make sure that your server meets the system requirements.

When the prerequisites are fulfilled, run the Web Installation Wizard :

  1. Browse to https://localhost or your https://domain-name
  2. and just follow the steps in the web installation wizard.

This is everything you need to get started.

Administrator account

It's the most important account of all, so make the password as strong as possible and store it somewhere safe.

Web installation wizard
Fig.1 - Web Installation Wizard, checklist.

1. Once the installation is complete, you should confirm to change the access permissions of mainfile.php
and give only read permission for everyone ( owner, group, others) chmod 444 = (r-- r-- r--)

2. You must also confirm that you want to remove the Web Installation Wizard.
However, you can keep the Installer on your server for development purposes,
in case you need to reinstall the application or install a new instance.
It is recommended to secure the Web Installation Wizard with a password.

Secure the installation wizard

If you are planning to reuse the installation wizard, we strongly encourage you to protect with HTTP authentication
Edit the file /install/passwd.php and put an username and password to avoid a malicious attack or worse.


Recommended System Specs

Apache 2.4.x

Easy to use, functionality and features

MySQL 8.0.x

Compatibility, XML and native JSON

7.4.x

Anticipating future migration

Some hosting providers, media or tech evangelists are desperately trying to hype and push you to adopt new technologies overnight, however, it would be wiser to take a good first step with a proven technology. We recommend this LAMP stack specs because you can get the best comparison results with each vendor in a live production environment. Simply put, It has been in use long enough that most of its initial flaws and inherent problems have been fixed. Such mature technology has set the de facto standard for getting started.

Scalable hosting

Based on public information, the largest cloud providers are selling the recommended LAMP stack to address a wide range of use cases, from small-scale hosting to medium and large enterprises. We encourage you to do your own research to ensure the best fit for your unique needs. The key features to look for include easy scalability, a partner network, managed services, and paying only for the services and resources actually used.


Akamai Linode

Amazon Web Services

Microsoft Azure

CentOS Linux

DigitalOcean

Google Cloud

IBM Cloud

OVH

LAMP stands for Linux, Apache, MySQL, and PHP. Together, they provide a proven set of software for delivering high-performance web applications.

- LAMP stack on Cloud Providers

Using proven mature technology means finding that sweet spot after the beta testers and before the end of a product development lifecycle.

- Program Development Life Cycle

Composer

XCL Bundle Package is compatible with Composer, the de facto standard for PHP package management,
for users who want more control over installation and to extend the file manager with cloud storage.

  1. Install composer “packages” or libraries in your folder /trust_path/vendor/
  2. Composer generates a vendor/autoload.php file.
  3. The file is automatically loaded and available for your web application.

Learn more about Composer and Packages


Update Manager

The software update management process is necessary to maintain operational efficiency, continuous improvement process and the stability of your Web Application Platform.

X-Update Manager provides an effective and user-friendly dashboard with a set of features that can help manage the complex task of applying software updates to Web Applications.

Update

Refers to a new minor version with corrections to already existing features.

Upgrade

Refers to a new major version that contains both new and different features and corrections to already existing features.
Please note that Modules and Themes need to be up-to-date as well. Otherwise, they will not work with more recent versions.
New XCL 2.3.x versions typically include new features and usability enhancements.

  1. Export your MySQL database to UTF8
    Replace your domain name if needed
  2. Make a new local installation to test
  3. Import your database UTF8
  4. Update modules from your Control Panel
  5. Select your default template

Migration

Means that your installed version is replaced by a newer or changed version with similar or extended functionality.
Your site is running locally on your computer and you plan to deploy to an online hosting provider.
Or you plan to migrate your site from one web server to another.

  1. Export your MySQL database to UTF8
    Replace your domain name if needed
  2. Edit your mainfile.php with new settings
    New server path
    New domain name
    New database
  3. Import your database UTF8
  4. Update modules from your Control Panel

Consider the migration if your are experiencing significant growth, changes in the business model and processes that require the system to be extended or integrated with modern tools. This will save you much time in the future, eliminate the error level, and contribute to your business’s further growth.

Backup

Make a backup of your database and files for any emergency case. If you find that some data is corrupted or missing, you can restore it from the backup.

Documentation

Each module has its own documentation, accessible from your administration control panel --> Module --> Help

Built-in Action Search

Use Action Search from your administration to quickly find a feature of your platform and installed modules.


You've reached the end of the Installation guide — we hope you enjoy your new Web Application Platform!